Personal mailing lists
Contents
1. Using personal mailing lists
Users with Tokyo Tech Mail address can create personal mailing lists (ML).
If your Tokyo Tech Mail address was toukou.t.aa@m.titech.ac.jp, for example, you could add characters before the "@" to create customized mailing lists:
toukou.t.aa-xxxxxx@ml.m.titech.ac.jp
The "xxxxxx" part can be set to anything you want.
Some departments, majors, and laboratories allow users to create ML that do not contain their Tokyo Tech Mail addresses.
Ask your administrator for more information.
The maximum number of personal mailing lists per user is 30. Like your Tokyo Tech Mail address, your mailing lists expire 90 days after your IC card expires.
2. Setting up mailing lists
- Log in to the Tokyo Institute of Technology Portal and click "Mailing List".
- Click the "Add a List" link on the left side of the menu.

- Enter the address and the name of the ML.
Configure the mailing list settings and click "Add" at the bottom of the screen.
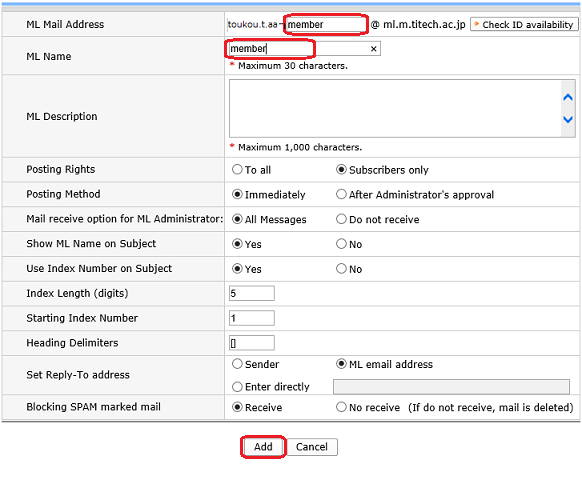
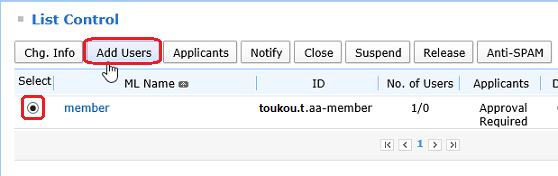
Main functionsPosting restrictions Posting is restricted to registered ML addresses only. Posting methods Methods can be approved via the "Mailing List" list management feature. Receive e-mails from the ML administrator If you select "No", you will only receive post error messages. Show ML name The ML name is appended to the subject line of each e-mail post. Show sequence number The ML name is appended to the subject line of each e-mail post. Sequence number digits If the sequence number digits is set to "5", the sequence numbers range from 00001 to 99999. Initial sequence number The sequence number increases with every e-mail post. Parentheses type This setting lets you choose the style of parentheses to enclose the ML name and sequence number in. Reply-to settings This setting lets you specify an address to receive replies. Receive e-mails marked as spam This setting lets you choose whether to receive e-mails that your spam filters determine to be spam. - Once setting up the ML is finished, the next step is to add users.
Select the ML and click "Add Users".
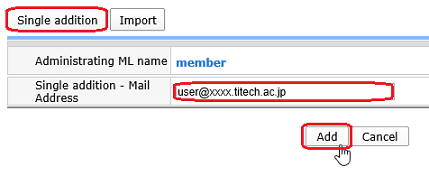
- To register users individually, click the "Single addition" button on the left side of the top menu.
Enter an e-mail address and click "Add".
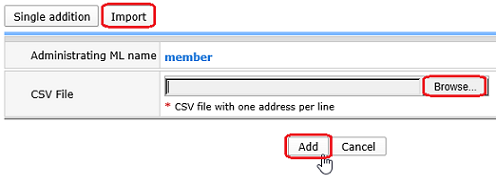
- To register users as a group, click the "Import" button on the left side of the top menu.
Click "Browse", select a CSV file, and then click "Add" at the bottom of the screen.
CSV file format:
E-mail address 1
E-mail address 2
E-mail address 3
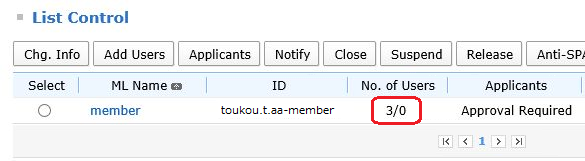
- When you want to delete registered individual e-mail addresses, click the numbers of the ML address including e-mail addresses you want to delete, which is under "No. of Users" on "List Control".
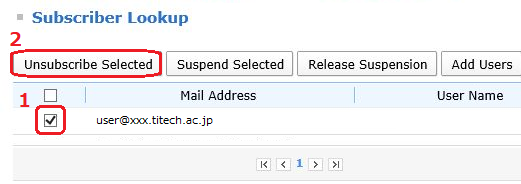
- Select individual e-mail addresses which you want to delete and click "Unsubscribe Selected" button.
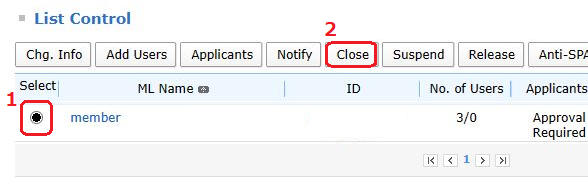
- When you want to delete added mailing list, select the mailing list that you want to delete and click the "Close" button.